19 September, 2011

pinspiration monday!


I have been coveting one of these or one of these fabric necklaces for ages, and have posted loads of these, or variations thereof, on my pinterest. So, on a stashbusting mission, off I went. I need to give thanks to the lovely Melissa, without her tutorial, I probably would not have been spending nap time this way, today.
Okay, so here we go...

From a green stretch fabric scrap (could have used an old stretch top - next time) I gave the rotary cutter a workout and cut five looong strips no more than 1.5-2cm wide (sorry, imperial peoples - maybe 1/2-3/4 inch?). Then The Gherkin and I played tug-o-war with the strips, til they were all curled over on themselves and were starting to look more like yarn (or zpaghetti).

Then, The Gherkin out of the house for a while, and Little Pickles faaaast asleep, I got to work!
I decided I wanted a mix of plaited (braided) and plain curled fabric, so my steps are a wee bit different from the original sources.


Step 1.
Tie a big ol' knot to join together three strips at one end. Plait (braid) away, until you think you've had enough. Something I discovered, was if you stretch the fabric while you are plaiting, you'll get a narrower, longer plait... see what you like, and do it your way! Tie another big knot. (or you could pin at this point but I am more of a lunky knot kind of gal... we're going to cut the knots off later, anyway.


Step 2.
Lay your plaited fabric on a flat surface, and then loop your long, non-plaited strips back and forth, back and forth, next to the plaited strip.


You can then pin one side of the looped ends together with the plaited end on the same side, or you can just cross your fingers as you carry it all to the machine.

Step 3.
Pop the ends you have gathered together under your machine foot and go back and forth, back and forth, until you think it will stay together.


This is when I then had a play to make sure I would be happy with the look of the finished product. Have a play. If you think you would like the plain fabric strips wrapped around the plaited strip, do this now, if you think you would like the plait to lie flat, do that.

And then get your other ends together and sew across these.

You now should have one "group" of fabric strips that have been sewn together at each end (and this is when I cut my big lunky knots off).

Step 4.
Now, stitch these ends together, one on top of the other. Now you have a loop. It's starting to look like a necklace now, right?

Step 5.
Find a wee scrap of the same stretch fabric and wrap it around the joined ends, as many times as you like. You could then stitch this in place, but I did some cheeky weaving in with my crochet hook... ;)


Step 6.
Check yourself out in the mirror! Lovely. Now, if you had been previously inspired (as I had) by this gorgeous pic, you may also have made it the right size to fit your head, too. Hooray!


ha ha love this cool backdrop???
what to do when the room is a pigsty.... sit in front of the towels on the clothes horse, of course!

Enjoy lovelies - do let me know if you have made on of your own. I am thinking, next one will be coral and egg yolk yellow. Or, maybe mustard with grey? Or pink. Yeah, maybe just pink. xo

16 September, 2011

The Big Reveal


So, here he is in his new favourite thing - a blue, sparkly tutu. I hope it is okay to confess here that I used the cheeky no-sew method! I am also sorry that I can't remember the original source for this (thought it was sew mama sew but now can't seem to find it), but I do know that if you pop it into Dr Google a thousand results will come up!

But here is my super-easy version:

Step 1: Sew a "tube" of elastic to fit small person, ie. just get a piece of elastic that would fit round her/his middle and then sew the ends together).

Step 2: Cut piles of tulle into 10-20cm wide strips, I did these of varying length, but you could be more even with it... you may even work out the perfect length by measuring up your wee person! Our tutu is a bit chaotic, so is more like a wild faerie tutu, than that of a prima ballerina! Yippee for rotary cutters! I think I ended up with about thirty to forty strips.

Step 3: I then mixed all of the strips into a big pile, to pop them on randomly, but some of you might like to work more neatly ;) Fold one strip of tulle in half, put the loop at the centre behind and above the elastic with the ends hanging down behind the elastic. Then pull the ends up in front of the elastic and through the loops. I'll pop photos here soon (have to take pics in daylight).

Step 4: Repeat til you're done!

Happy tutu-ing! Oh! and jut in case you thought The Gherkin just at sat around looking gorgeousin his tutu:


Have a lovely weekend! xo

secret mummy's business


secret mummy's business, originally uploaded by summer pickles.

Shhhh... secret mummy's business underway.

I won't do the big reveal until The Gherkin has seen it, but I can tell you that there is now silver and blue glitter from one end of our house to the other...

Chat soon xo

15 September, 2011

thrifty thursday returns!

Another day, another opshop!


Those of you who know me well know I love the 70s. Love the greens, love the mustards, love the burnt oranges... So imagine my delight when I stumbled across these lovely mugs!

I was so excited to find this gorgeous little squirrel, especially after having found an acorn sugar bowl a few weeks ago. Suzie the squirrel was made in Japan, and is a little irregular --- but so sweet! (and terribly out of focus, it seems! - apologies for this photo!) 


Oooh! and this painting, which I actually bought for the frame - had some big plans in mind for this, but Mr Pickles & I have since fallen for this painting, so it seems the plans will have to wait until another frame comes my way.

Oooh! Oooh! and some flying duck fabric (!) which shall be revealed later (I have exciting plans for this one).

And just because, here is my wee one, our little pickle, in a quiet moment this week. And yes, this is that blanket...  [Sigh] He's so lovely.


Have fun lovelies xo

05 September, 2011

Pinspiration monday

Well, hello!

I have been spending ridiculous amounts of time in front of pinterest. Typically whilst waiting for dinner to cook, or for the boys to get to sleep (and stay in bed). And it is a brilliant source of inspiration!!

So, rather than just pinning the things that have inspired me for the weeek, I have decided to pop them in here too (with credit to the likes of http://dreamgreendiy.com/ for the idea for pinspiration mondays...).

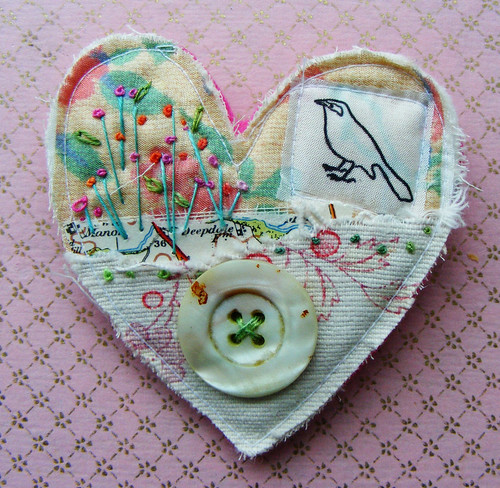
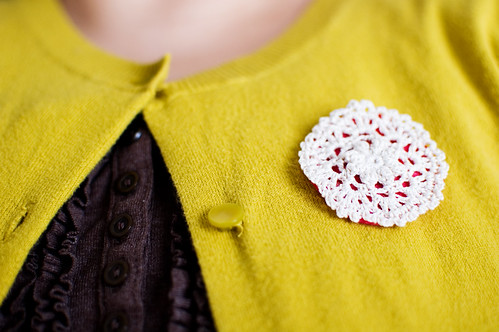
And what better way to kick off than to share with you some gorgeous broochy goodness.

textile collage brooch


Not a brooch, of course, but this would be so sweet as a brooch!

45.365: ruffles and a doily


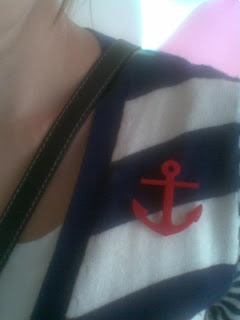
I was originally planning to make my own nautical anchor brooch, something like this one from modcloth, after remaining empty handed after searches on etsy and madeit...
...that is until my (new but completely lovely) friends at found: the store spoke with their friends at red revival who custom made me this lovely thing (sorry for the fuzzy shot - I am still the owner of a very "retro" mobile phone with a shonky donkey camera).

Oh! and on the dress front? Lots of unpicking to do, I'm afraid. I am learning to read the pattern reviews before I start - loads of reviews online telling me that the Butterick B5210 has plenty of "ease" (the technical term for saggy baggy?) and that I may want to make 1-2 sizes down. Sigh. Oh, well, a good lesson learnt!

Chat soon xo

Thanks

to my other half who puts up with the mess, makes me happy and keeps me sane.
to my beautiful boys who give me so much i want to remember and make the everyday something to treasure.
to my mum who alway let me play with fabric and the good scissors, and who knows a lot of songs.
to my dad who was always happy for us to make a mess and who laughs at us when we deserve it.
to both parents for making sure i still got the work done.
to my dear friends for listening and for sharing the laughs.
and, to you for visiting!